
When you purchase a DigitalOcean VPS server today, you can immediately receive $100 in free credits to offset the server costs.
HDDCLUB has personally purchased one and is sharing the entire registration process with everyone.
For those who need to set up a website, you can follow this tutorial step by step because there’s a $100 credit, but please note that this $100 credit has a time limit of 60 days, which means it’s valid for 2 months.
So, for those who like freebies, trying out a DigitalOcean server can be used for practice and building a website for free for 2 months.
The cost might just be the $5 account verification fee. Spending $30 to use a high-performance server for 2 months is quite a good deal, isn’t it?
If you plan to use it for the long term, it’s recommended to choose a configuration and cost that suits your needs. If you’re only planning to try it out for 2 months and then abandon it, you can follow the instructions on the homepage:
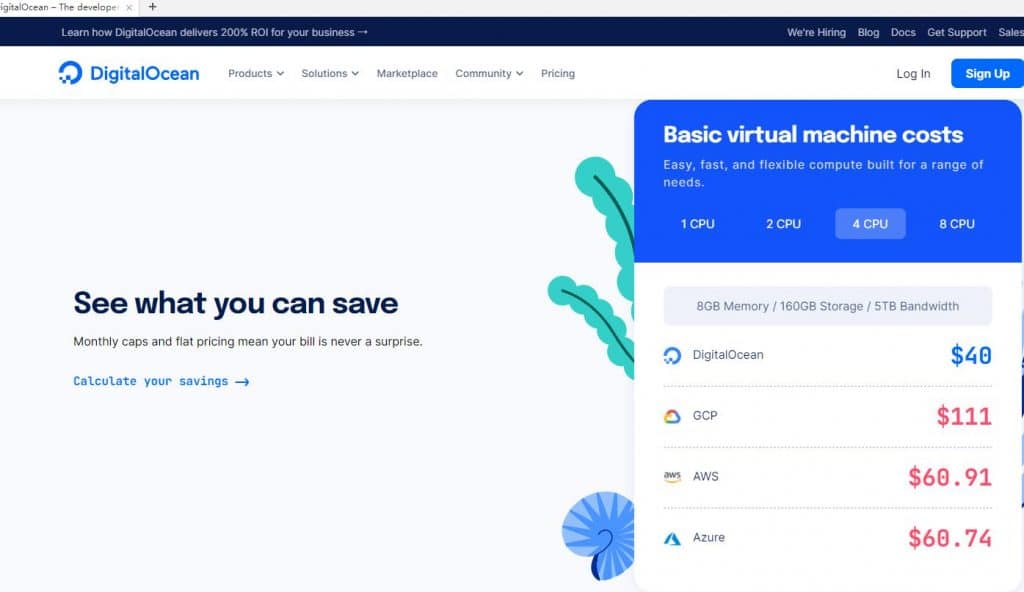
It’s recommended to buy a server with 4 CPU cores, 8GB of RAM, 160GB of disk space, and 5TB of bandwidth, which is an excellent choice.
Anyway, the cost of $80 over 2 months can be completely covered by the $100 credit.
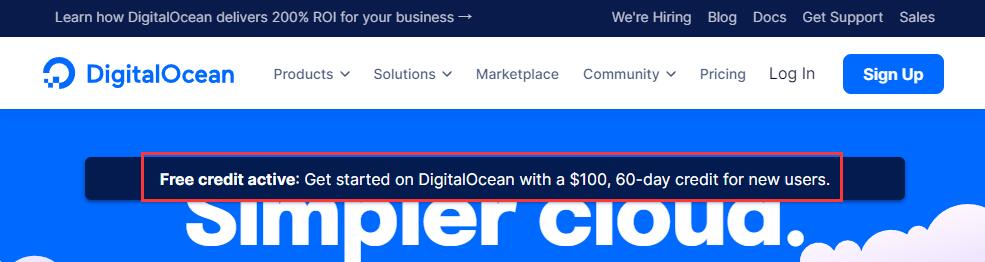
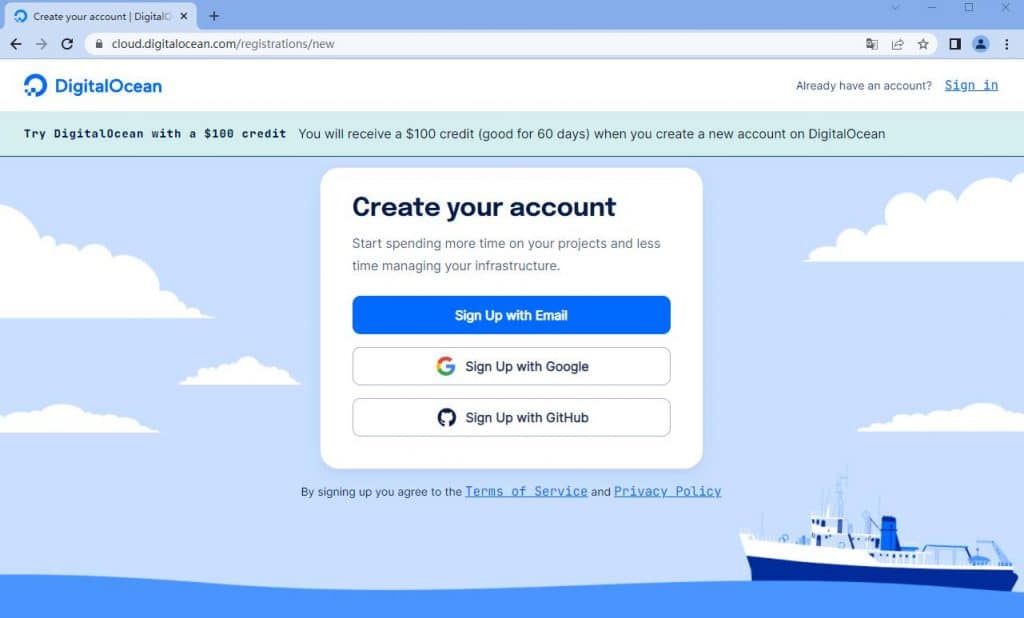
However, there is no $100 credit when you register and purchase directly on DigitalOcean’s official website. You can use this link to register: Click Here.
You must see the $100 credit prompt like the one in the following image before proceeding with registration. Otherwise, you won’t receive the credit without this prompt:
Now, let’s get back to the main topic and walk you through the registration and purchase process for a DigitalOcean server:
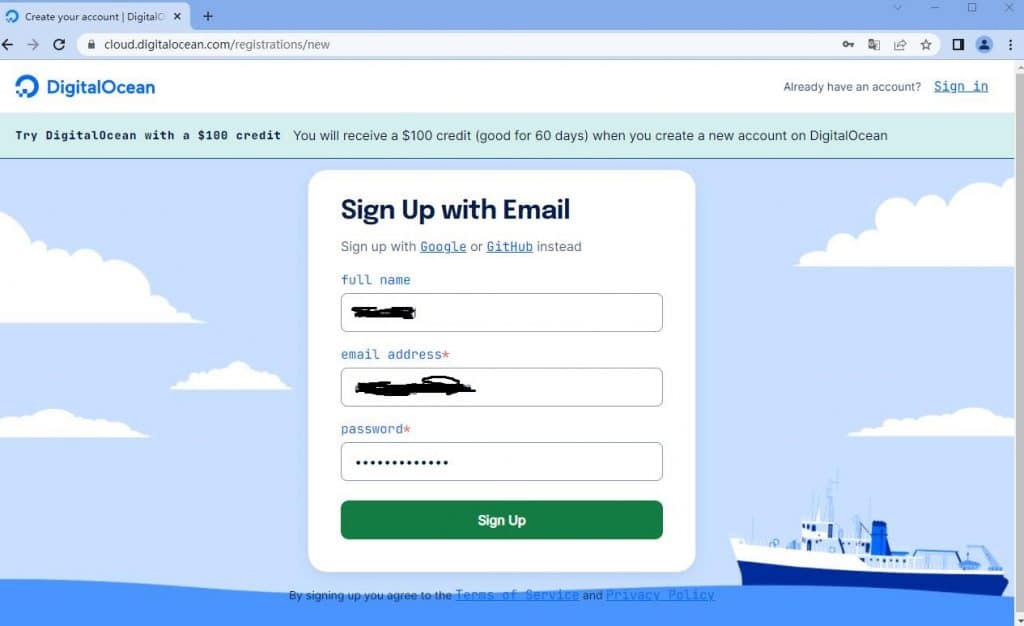
- As shown in the image below, I used email registration, select “Sign up with email.” You can also register with your Google account.
- Fill in your name, email, and password.
- Complete the captcha by selecting the correct pattern.

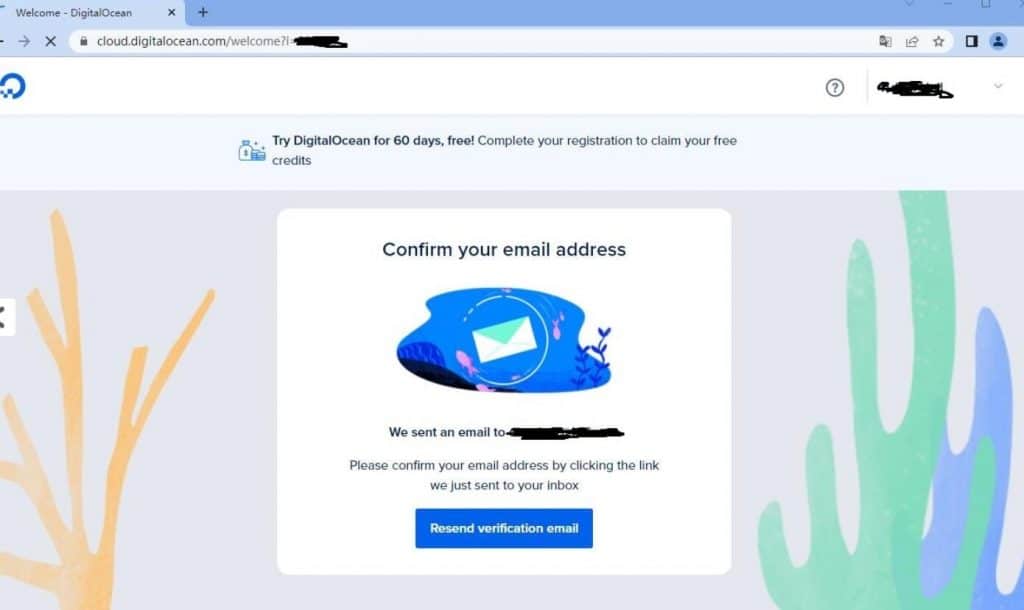
- Log in to your email and click the confirmation registration link.
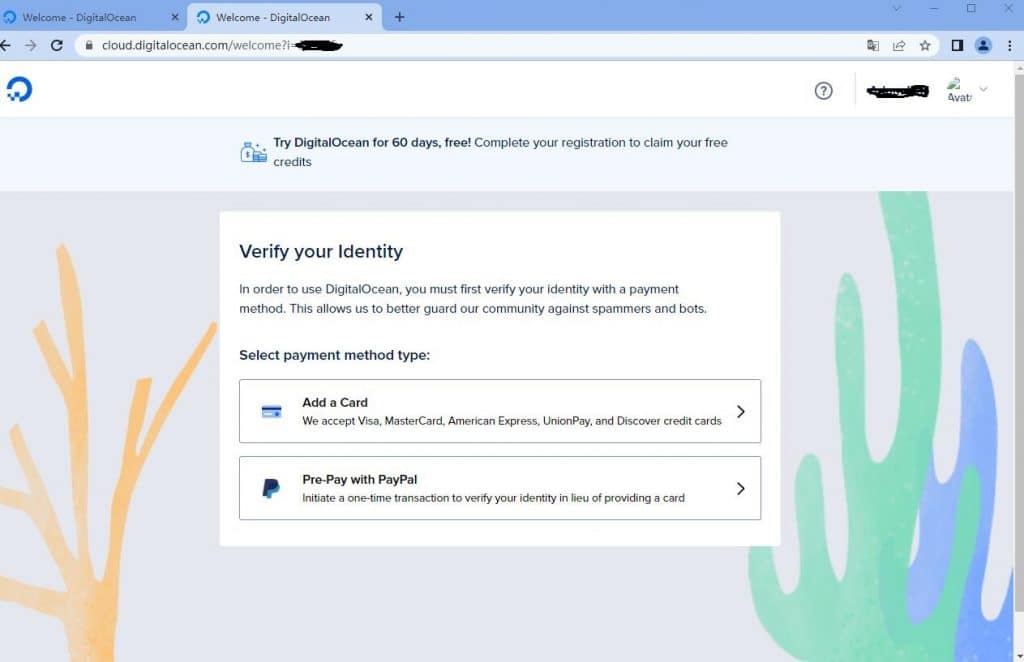
- Next is the identity verification. Here, you can either use a credit card for verification or PayPal.
I chose PayPal for verification, and you need to deposit at least $5 into your account. This $5 will be in your DigitalOcean account and can be used to offset expenses.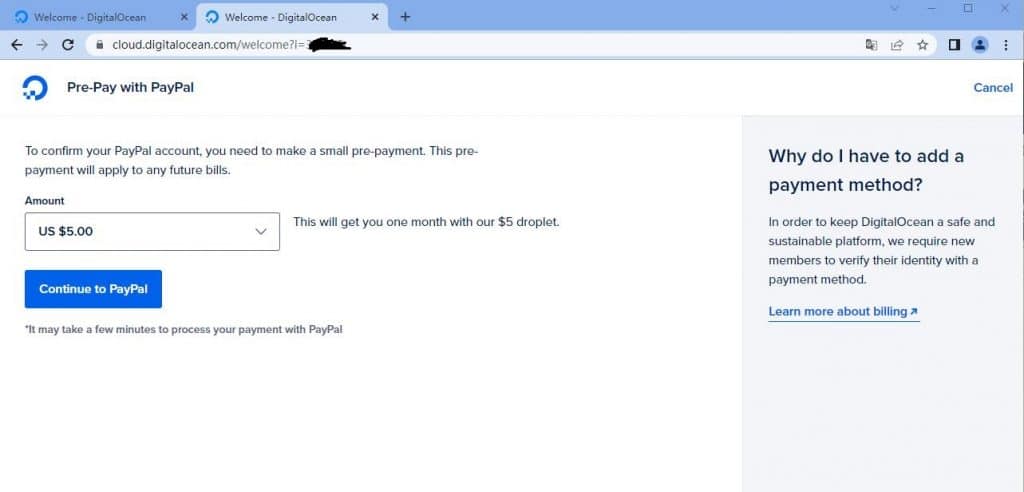
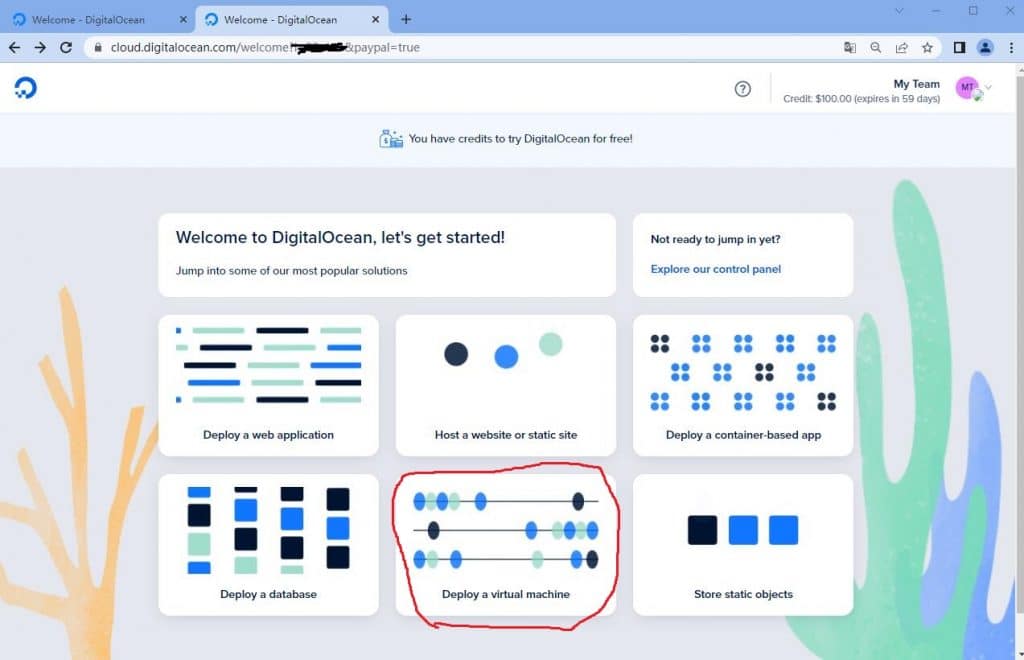
- Start purchasing a VPS server. Choose “Deploy a virtual machine.” You can notice that $100 in credit has already been added in the upper right corner.
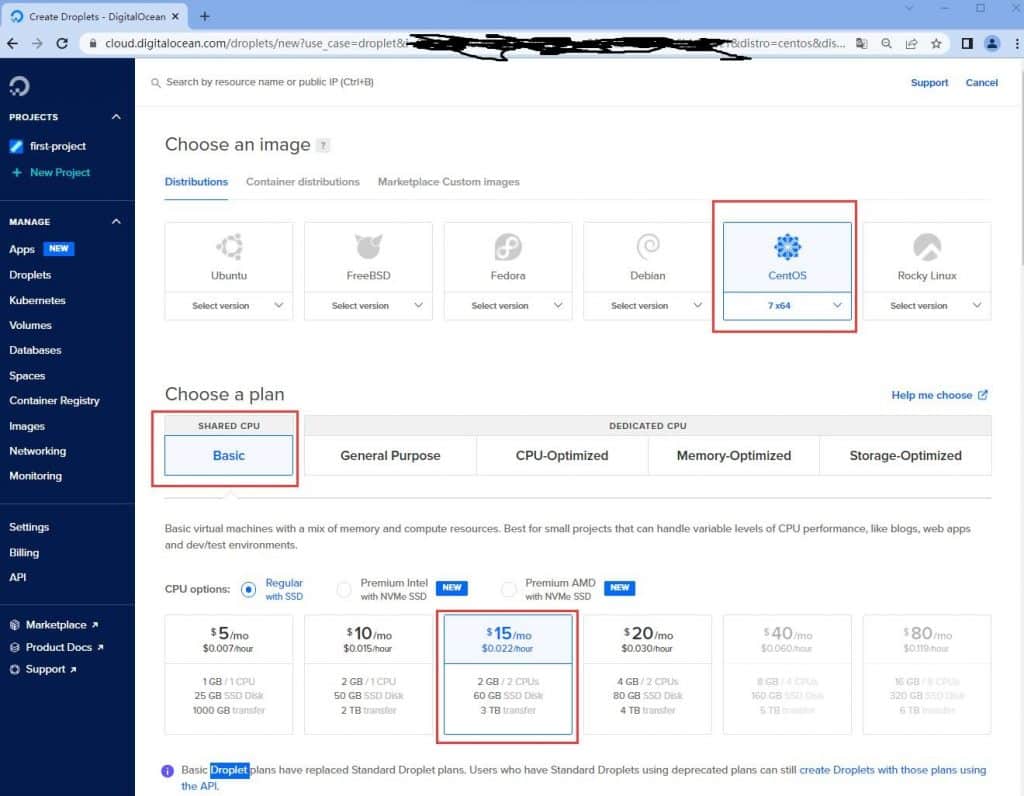
- Choose the configuration you want. Since I plan to use it long-term and don’t want to miss out on the $100 credit, I selected a 2-core, 2GB RAM VPS with a monthly cost of $15. Since the $100 credit expires in 2 months, it effectively offsets $30, and the remaining $70 won’t be used.
I bought a server in the UK region:

but there are also options for the US, Singapore, Germany, and other regions. You can choose based on your needs. If you want to check the speed of the data center, you can open the corresponding link and download a test file to gauge the speed.
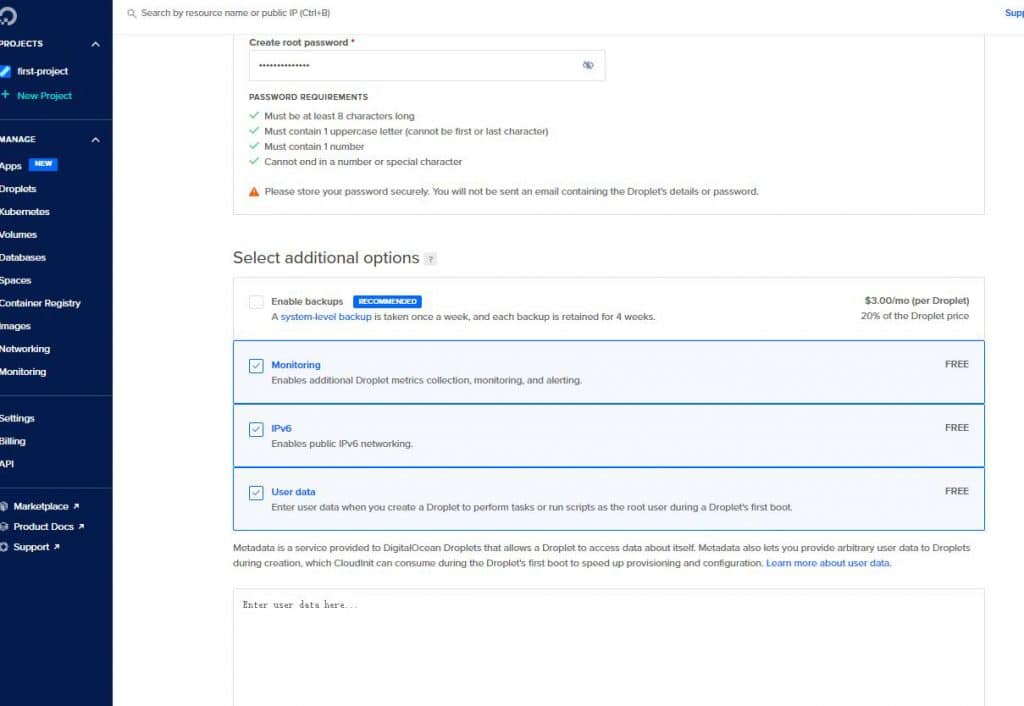
- Create your root password. You will use this password when managing your website via SSH.
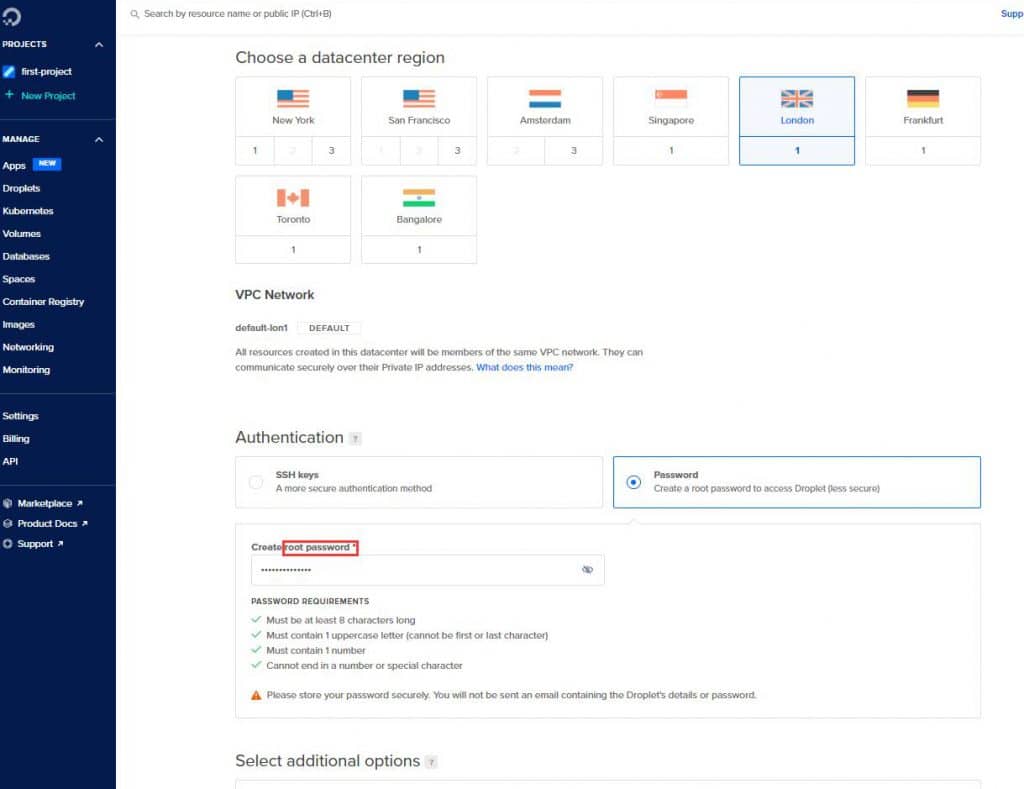
Select any free services you want to add; they are, after all, free.
- Finally, click “Create Droplet,” and you’re done.

Here’s some additional information:
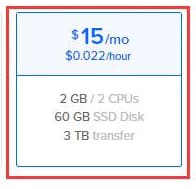
As you can see, DigitalOcean’s servers can be billed by the hour, at $0.022 per hour, totaling $15 per month.
You can also check your billing dashboard, as shown below. This screenshot reflects usage for a little over half a day:
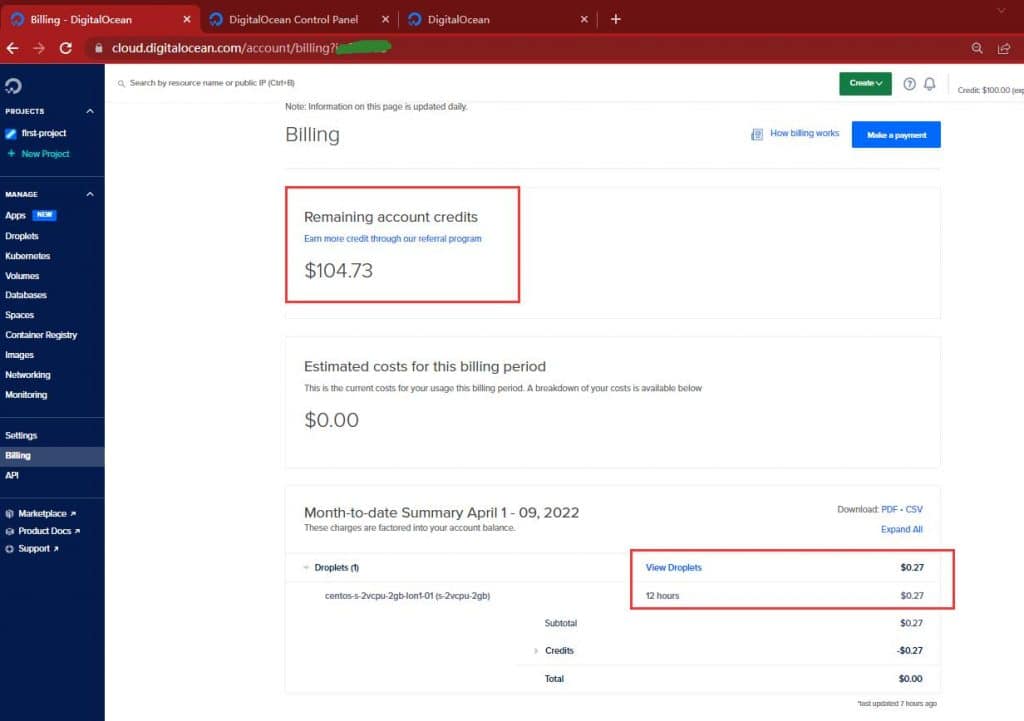
It seems to be about 12 hours, and the charge is $0.27.
Once you’ve made your purchase, you can start building your website.